We are going to do a series on using Gmail which should hopefully be useful to a number of people, especially since Android for smartphones and tablets is becoming more widespread. Firstly we are going to show you how to use filters. Filters that you setup in browser based gmail will action before you get emails to your smartphone or tablet, so can be very useful. We get asked all the time about the best ways to setup and use Gmail in all types of situations. Be aware that Google Apps uses most of the tools and settings that Gmail uses, so these will work for Google Apps email addresses too. Filters are a great way to sort your emails either into labels (Gmail’s version of Folders) or forward certain emails to another address or even directly delete certain emails. These are automatic ‘actions’ that are performed on your emails automatically before you view them.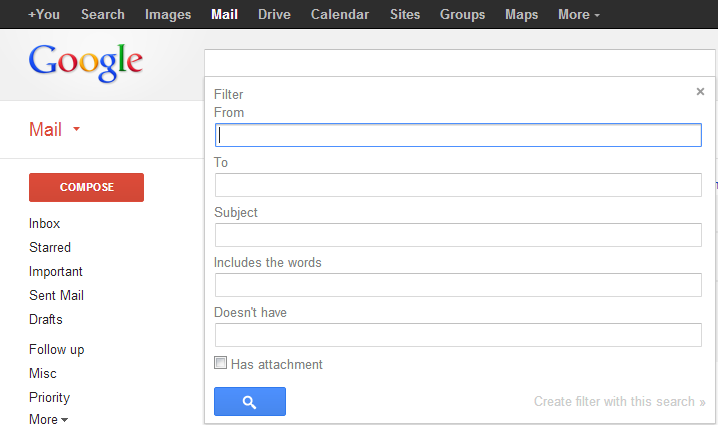
As shown in the screenshot above you first need create the criteria for your filter. You get to filters by going into settings and then clicking on the filters tab. Then click Create Filter and you will see the above view.
- From - This is used to filter emails from a certain email address or person (Can just be their name does not have to be the email address)
- To - Similar to above, but just filtering who the email was sent to, rather than from. (Can be useful if you have other email addresses forwarded to your Gmail account)
- Subject - Self explanatory. Words or phrases in the subject line of an email
- Includes the words - This is used for words in the body of the email
- Doesn’t have - For filtering by words that are not in the email body (so will find emails without the text you put in here)
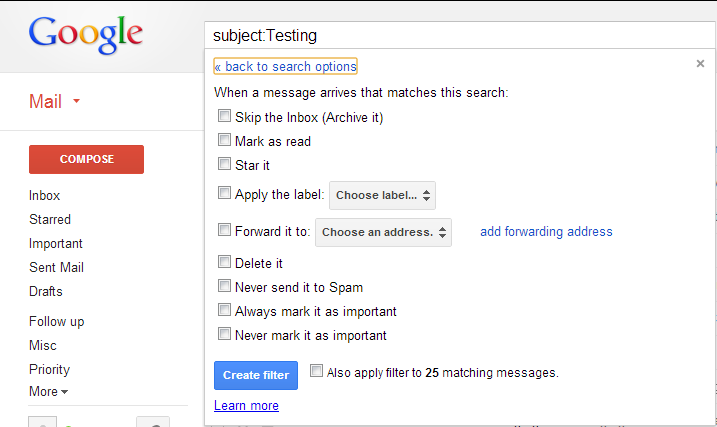
The next screenshot above shows the ‘actions’ to perform on the filtered messages.
- Skip the inbox - this basically does not put the ‘Inbox’ label on the email. (See italicized text below about archiving)
- Mark as read - Marks the email as read.
- Star it - adds the starred label to the email so it will have the gmail star shown in yellow
- Apply the label - This apply’s either an existing label or you can create a new label of your own. (your own label will then show down the left column and you can also choose a colour for it)
- Forward it to - Forward the email to another email address. You will need to have access to this address initially as you will have to confirm it by following instructions in an email sent to that address.
- Delete it - Deletes the email by placing it in the bin (where it will stay for 30 days and then be permanently deleted)
- Never send to Spam - Will not place the email into spam
- Always mark as important - Adds the important tag to the email
- Never mark as important - always leaves the important tag off the email
- Also apply filter to - This last option is very useful as you can tick this to ‘action’ your current emails with your chosen criteria. Then click create filter when you are happy with your selected options.
To archive or not to archive… Gmail uses labels rather than folders like Outlook. When we talk about archiving, basically that is removing all labels from the message. Yes ‘Inbox’ is considered a label so when a message is archived it will show only in the All Mail part of Gmail. So if a message has a label like Inbox or one you have created, it will also show in All Mail with the label attached to it. Basically using labels reduces the possibility of having duplicate email messages as when you add a label it is just a tag on that email and it does not create a copy.