Gmail has the ability to collect mail from other email accounts (using pop3) and also send emails as though they were sent from another email address. This is a very useful feature especially these days with users having more and more email addresses to keep track of. This enables you to have one Inbox which you can see all your emails in, and even send replies from other addresses.
Adding a POP3 email address to be retrieved by gmail
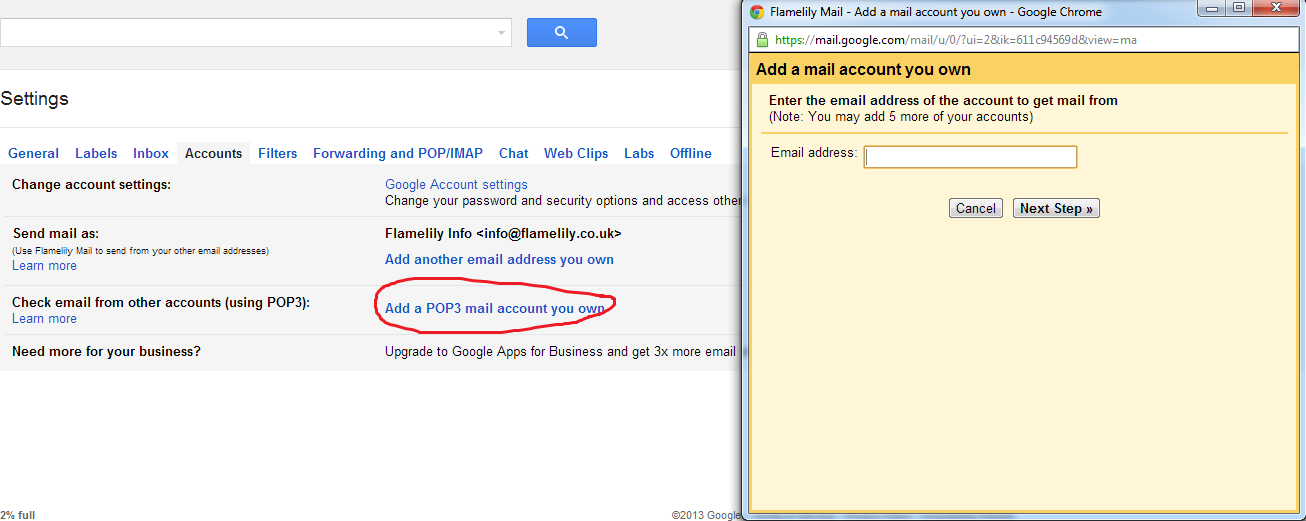
Go into settings, accounts and imports and click on ‘add a POP3 mail account you own’ and then enter the email address in the box provided, then click ‘Next Step’. 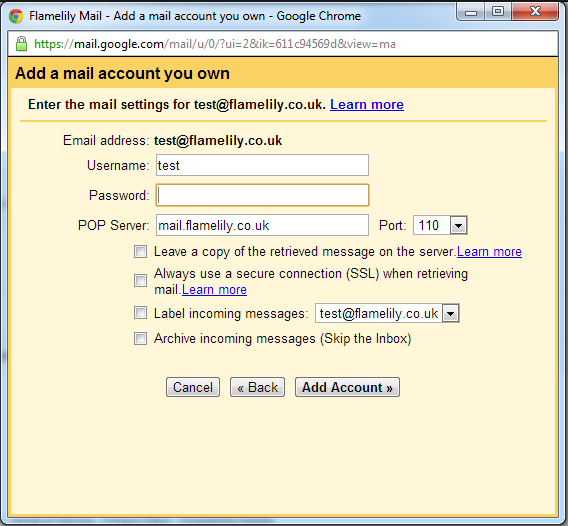
The next stage is to add all the POP3 details like the username (usually the email address), password and server with port numbers etc. You might need to get these details from your email service provider. You can also set things like whether you want to leave a copy on the server (useful if you have this account setup elsewhere), use a secure connection and whether to label the messages. Once you have done this just click ‘Add Account’ and gmail will test your settings and finish.
Adding a Send From email address

After adding the email for gmail to retrieve you can now add it as a sending address by clicking on ‘Add another email address you own’ next to the Send Mail as: option. This then enables you to enter your sending address and Name to display. We would suggest you untick the Treat as an alias, but you can read more about that option from the ‘learn more’ link. Then click the Next Step.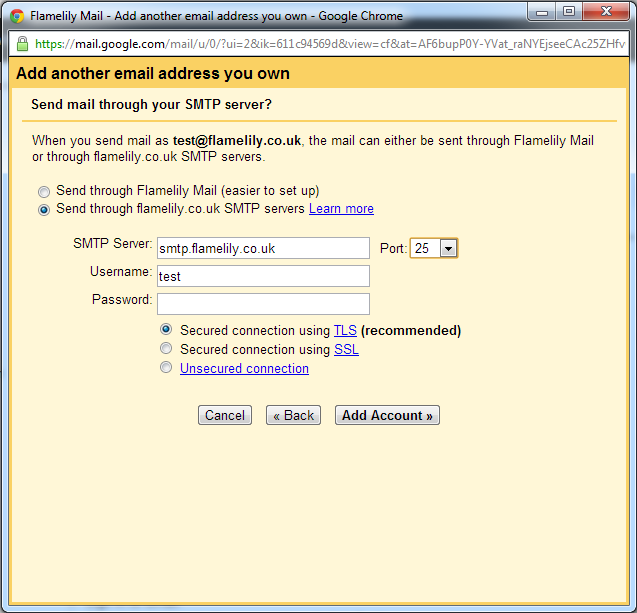
The next option is to decide if you would like to use the SMTP of the email address to send mail. This is the better option as sending through Gmail’s servers will show the email as sent via another account. I would suggest using the SMTP server if you have those details available. So just put the SMTP server details and port and specify if the server uses a secure connection. These details can be obtained from your email service provider. Then click ‘Add Account’ and Gmail will send a verify PIN to your email address you have just setup. This is obviously a security feature to protect your email address so other can’t use it. The email will contain the PIN and also have a confirm link which you can click to save you having to enter the PIN. So now you have a web based Gmail account which can have up to 5 other email addresses being retrieved in the background and also the option of replying from Gmail rather than opening up Outlook on the home PC. Just a word of warning, the POP3 checker does so in intervals so don’t expect an email that was just sent to show in your Gmail inbox straight away. If you want to force it to check for new emails (like an Outlook send and receive) you CAN do this under the settings, accounts and import tab. Just click the ‘Check Now’ under the relevant email address. Feel free to comment below if you found this useful. Part one of this series can be found HERE.